Affiliate Disclosure: Some of the links in this post are affiliate links. As an Amazon Associate, we earn from qualifying purchases. Read more in our affiliate policy.

How To Remove Tint From Car Windows – Complete Guide
Window tints are one of the most common car accessories available out there.
From boosting your privacy and reducing heat inside your vehicle, all the way to blocking harmful UV rays and preventing the shattering of glass, the benefits of tinting your car windows are certainly worth the addition.
However, a time comes when you need to replace your car’s window tint so it can continue to do its job efficiently. But to replace the tint for the new one, you got to remove it first!
So today, we’ll be presenting you with a full guide you on how to remove tint from car windows.
Why Should You Remove Your Car’s Window Tint?
Just like there are multiple motives for tinting your car’s windows, there are also a number of reasons why you may want to remove and replace windows’ tint.
Altering Appearance
Changing the way your window looks is a popular reason for removing a tint job. Perhaps you want a lighter tint, or maybe you don’t think the current tinting is dark enough.
It’s also possible that you don’t even want a tint, even if there’s nothing wrong with its appearance or condition. This whole aspect is related to your personal preferences.
Bubbling and Peeling
Do you know when your tinted window looks like it has developed some sort of a spotted pattern that just doesn’t seem to go away? Well, that’s called bubbling.
 Bubbling of the tint film doesn’t only look ugly and cheap, but the more you try to “fix” it by pressing down on the bubble spots, the worse it gets. That’s because there’s once your tint starts to bubble, there’s no going back.
In this case, your only solution is to remove and then replace the window’s tint. You may want to try peeling the film at the bubbling spots, but that’s not a good idea since you’re probably going to end up with glue and tint leftovers that look even worse!
Peeling is another issue caused by failing adhesive as the window tint ages over time. It’s particularly annoying because the moment a peeled area appears, it opens the door for curious hands to peel on the film some more until there’s nothing left.
Improved UV Protection
Removing your old window tint can give you better protection against harmful UV rays.
On one hand, the existing tint may be too old that it starts to discolor. You can notice this as your window tint becomes a purplish color.
Not only is this change aesthetically displeasing, but it also reduces the UV blocking abilities of your tint due to the breakdown of non-metallic dyes. You can fix this problem by installing a new tint, nothing else.
On the other hand, your current window tint may be simply outdated with less than adequate blockade of UV rays. Tinting technology has a lot more to offer nowadays such as superior UV protection that significantly reduces the risk of skin cancer.
Avoiding Tickets
Traffic laws can differ from one state to another, and so, tinting regulations may vary. In some states, such as California, your current window tint may be too dark that you receive a citation ticket.
In such a case, you’ll need to get rid of the tint before you can even think about getting the ticket dismissed.
How To Remove Tint From Car Windows

There are many ways you can go about car tint removal. Some of them involve making use of heat, while others rely on conventional scraping techniques.
The choice of method mainly depends on your skills, materials you can obtain, as well as how damaged the tint is. Up next, we’ll be discussing the 5 best ways you can easily DIY.
But first, let’s talk prepping!
Step #1: Get the Car, Window, and Tools Ready
If you want your window tint removal mission to be a success, then you should kick it off by coming prepared. This means getting everything ready for action, whether it’s gathering tools and supplies, or preparing your car and windows.
Starting by getting rid of any stickers or decals that may be decorating your car’s windows. By doing so, you’ll be avoiding unnecessary compilations and making the process of tint removal much simpler regardless of your chosen method.
If you decide to apply the steamer, hairdryer, or any other method that requires electricity to perform, make sure you’re using an electric extension cord that’s long enough to allow for comfortable movement. It should be well-grounded and able to reach the inside of your car since you’re going to be working from the cabin at certain times.
If you’re planning to go for a technique that depends on heat, don’t forget to roll down all the windows that you’re not working on. You should also open the sunroof if your car has one.
The idea here is to provide adequate ventilation, which is why you should follow the same guidelines when using ammonia.
Finally, if you’re going to use the steamer method, you should have it turned on ahead of time. That way, it’ll be hot enough by the time you get down to work.
As for method-specific tools and supplies, we’ll be listing the needed items for each technique in Step #2.
Step #2: Choose a Car Tint Removal Method
 As we already mentioned, some window tint removal methods rely on heat, while others will have you using your muscles to scrape. Here’s a breakdown of both categories, the tools they require, and the techniques they involve:
Hairdryer Method
Tools:
- Standard hairdryer
- Regular glass cleaner
- Sharp blade or razor knife
- Clean rag
- Paper towels
Procedure:
- Set the hairdryer on the highest temperature and intensity.
- Hold the hair dryer about 2 inches away from the window.
- Direct the airflow towards the edge of the tint film you want to remove.
- Wait for the glue to soften. You should see the corner of the tint film curling up.
- Hold this corner and proceed to peel the rest of the tint while angling the dryer so the hot air hits the area between the window glass and the peeling tint.
Steamer Method
Tools:
- Fabric steamer
- Water
- Clean rags or paper towels
Procedure:
- Set the fabric steamer on the highest temperature and intensity.
- Hold the steamer about 1 inch away from the window.
- Direct the steam towards the edge of the tint film you want to remove.
- Wait for the glue to soften. You should see the corner of the tint film curling up.
- Hold this corner and proceed to peel the rest of the tint while angling the steamer so the hot steam hits the area between the window glass and the peeling tint.
Sun and Ammonia Peel Method
Tools:
- Ammonia solution inside a spray bottle
- Fresh plastic garbage bags
- Regular dish soap
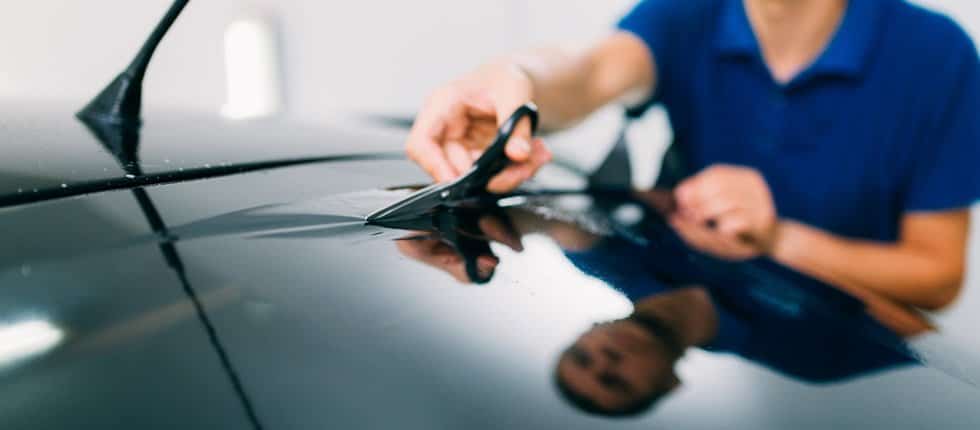
- Sharp blade or razor knife
- Scissors
- Paper towels
- Steel wool
Procedure:
- Cut multiple pieces of plastic garbage bags to fit and cover the outside and inside surfaces of the window.
- Spray the outer surface of the window with soapy water and cover it with a plastic bag piece.
- Apply tarp on all interior surfaces to protect them.
- Spray ammonia on the inner surface of the window and cover it with a plastic garbage bag. (Wear a protective mask to avoid inhaling fumes)
- Leave the window exposed to sunlight for about an hour. (At least 20 minutes)
- Slowly and carefully peel off the plastic bag. You should see the tint film peeling off with it. (Spray additional ammonia if starts to get dry)
- Use the blade to remove any leftover tint patches.
Soap and Scrape Method
Tools:
- Regular dish soap
- Regular glass cleaner
- Sharp blade or razor knife
- Clean rags or paper towels
- Spray bottle
Procedure:
- Try to lift one edge of the tint film with the blade or knife as carefully and as gently as possible.
- Grab the freed corner then continue to peel off the tint from the glass. Don’t rush the process to avoid tearing the film, or else you’ll have to another edge with your blade.
Soap and Newspaper Method
Tools:
- Newspaper
- Regular dish soap
- Regular glass cleaner
- Sharp blade or razor knife
- Clean rags or paper towels
- Bucket
- Sponge
Procedure:
- Spray the tint film with soapy water (preferably hot) until it’s thoroughly wet.
- Let the window sit in the sun for an hour or so.
- Check the newspaper surface every 20 minutes and spray more soapy water to keep it wet.
- Scrape and peel the newspaper with the blade. You should see the tint film sticking to the newspaper and peeling off with it.
If the tint isn’t easily separating from the glass, repeat the process.
Step #3: Get Rid of Leftover Tint Glue
Once you’re done removing the tint from your car’s window, there’ll probably be some adhesive residue still decorating the window. Here are a few ways to help you get out of the sticky situation:
- Alcohol – this is a cheap yet highly effective solution that should be able to rid you of your glue mess in no time. Use 90% isopropyl alcohol on a clean rag and simply wipe off the glue. Make sure you do this in a well-ventilated area to avoid inhaling the vapors.
- Nail polish remover – you may not think about this particular solution, but it’s surprisingly useful against adhesive leftovers. Use some nail polish remover on a clean cloth and put your arms into work. It may need a bit more effort on your part, but hey, you get a nice shine at the end.
- Dish soap – is there something that dish soap can’t do? Well, probably, but not today! You can use soapy water and a car ice scraper to remove sticky leftovers from your windows. This is a safe and simple method that gives you a chance to clean the car while you’re at it.
How To Remove Tint From Car Windows – Wrap Up
There you have it, a complete guide on how to remove tint from car windows. Remember, while there are several ways to get the job done, it’s crucial that you do your homework first.
Get familiar with the procedure steps to form an idea of how you’ll be performing them. Read the list of required tools and supplies for your method of choice, then make sure you have everything set to avoid interruptions.
Finally, stay safe. Be extra careful with sharp blades or electric devices and always wear a mask when dealing with chemicals that produce fumes. Good luck!
Disclaimers
All product names, logos, and brands are property of their respective owners. All company, product and service names used in this website are for identification purposes only. Use of these names, logos, and brands does not imply endorsement.
It is our policy to make every effort to respect the copyrights of outside parties. If you believe that your copyright has been misused, please provide us with a message stating your position and we will endeavor to correct any misuse immediately.
Some of the links in this post are affiliate links. As an Amazon Associate, we earn from qualifying purchases. This means if you click on the link and purchase the item, we may receive an affiliate commission, at no extra cost to you. This helps us keep this website alive. Read more in our affiliate policy.